VPN Blocking Wi-Fi? Troubleshooting Wireless Network Detection Issues on Windows
Many Windows 11 and Windows 10 users have encountered a frustrating issue where their computers fail to detect Wi-Fi or wireless networks after a Virtual Private Network (VPN) is installed. This problem often manifests after a system update or upgrade, leaving users without internet connectivity despite having a seemingly functional wireless network adapter. This situation can be particularly disruptive, especially for those who rely on VPNs for security and privacy, only to find their basic internet access compromised. This article aims to explore the symptoms, underlying causes, and effective solutions to resolve this connectivity problem.
Symptoms of Wireless Network Detection Issues with VPN
When a VPN installation interferes with wireless network detection on Windows, several symptoms may become apparent. Recognizing these signs is the first step towards diagnosing and resolving the issue.
Wi-Fi Network Not Detected
The most prominent symptom is the inability of your Windows 11/10 computer to detect any available Wi-Fi networks. Even when you know Wi-Fi networks are present and functioning correctly (e.g., other devices can connect), your affected Windows machine shows no networks in the list of available connections. This issue specifically occurs after a VPN has been installed or after a Windows update where a previously installed VPN might be the root cause. This lack of detection effectively cuts off wireless internet access, rendering online tasks impossible.
Ineffective Troubleshooting Steps
Standard troubleshooting steps, such as restarting the computer or reinstalling the wireless network adapter driver, often prove ineffective in resolving this specific VPN-related Wi-Fi detection problem. While these actions can fix general connectivity issues, they typically fail to address the deeper conflict caused by the VPN software. The wireless adapter itself is often functioning correctly, meaning the problem lies not in hardware malfunction but in software conflict or configuration issues. This can lead users to waste time on standard fixes while the core issue remains unaddressed.
Impact on Wired Ethernet Connections
In some instances, the issue extends beyond wireless connections and can also affect wired Ethernet connections. After a Windows OS upgrade, even if Wi-Fi is not the primary connection method, users might find that their wired Ethernet connections also cease to function correctly. This can impact both built-in Ethernet adapters and those connected via USB. The broader impact on both wired and wireless connections suggests a system-level problem rather than an isolated issue with the Wi-Fi adapter itself, further pointing towards a software conflict possibly initiated by the VPN installation or its interaction with the operating system after an update.
Understanding the Root Causes of VPN-Related Wi-Fi Issues
Microsoft has identified that this connectivity problem is often linked to VPN connections present on the computer during a Windows upgrade. However, hardware incompatibility with the updated Windows OS can also be a contributing factor. Delving deeper into these causes is essential for targeted troubleshooting.
Legacy VPN Software and Filter Drivers
The primary culprit often lies in older VPN software versions and their associated filter drivers. During a Windows upgrade, these older software versions might not be properly updated, leading to conflicts. Specifically, a component called the “Deterministic Network Enhancer” (DNE) filter driver, present in some older VPN clients, is known to cause issues after a Windows upgrade. If this filter driver is not correctly upgraded or removed during the OS update process, it can interfere with network detection and connectivity. This incompatibility is a major reason why users experience Wi-Fi problems after upgrading Windows with older VPN software installed.
Hardware Incompatibility
While less common than software conflicts, hardware incompatibility can also contribute to network detection problems after a Windows update. If the wireless network adapter or other network hardware is not fully compatible with the latest Windows version, it may lead to connectivity issues. This is more likely to occur with older hardware or devices that lack updated drivers for the newer operating system. In such cases, Windows updates might expose underlying incompatibilities that were not apparent in previous OS versions. Checking for updated drivers from the hardware manufacturer can be a crucial step in ruling out or addressing hardware incompatibility.
Step-by-Step Solutions to Restore Wi-Fi Connectivity
Resolving the Wi-Fi detection issue often involves specific steps that target the VPN software and related network configurations. These steps, while slightly technical, can effectively restore your wireless connectivity.
1. Utilizing the Troubleshooter Tool
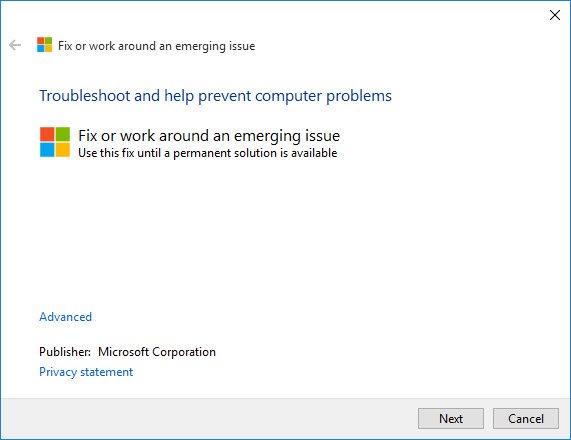
Microsoft provides a specialized troubleshooter designed to address this particular VPN-related network issue. This tool is often the quickest and most direct way to resolve the problem.
Download and Transfer: Since the affected computer likely lacks internet connectivity, you will need to download the troubleshooter on another device with internet access. Transfer the downloaded file to the problematic computer using a USB drive or other removable media.
Run the Troubleshooter: Once transferred, execute the troubleshooter on the Windows 11/10 machine experiencing the Wi-Fi issue. The troubleshooter will automatically detect and attempt to fix the VPN-related network configuration problems. Follow the on-screen prompts to complete the process. This automated approach can often resolve the issue without requiring manual command-line interventions.
2. Manual Command Execution
If the troubleshooter doesn’t fully resolve the problem, or for users who prefer a manual approach, running specific commands in the Command Prompt can be effective. These commands target the problematic DNE filter driver and reset network configurations.
Open Command Prompt as Administrator: Right-click on the Start button and select “Command Prompt (Admin)” or “Windows PowerShell (Admin)” from the menu. Running as administrator is crucial as these commands require elevated privileges to modify system settings.
Execute Command 1: Registry Deletion
Type or copy and paste the following command into the Command Prompt window and press Enter:
reg delete HKCR\CLSID\{988248f3-a1ad-49bf-9170-676cbbc36ba3} /f
This command removes a specific registry key associated with the problematic DNE filter driver. The /f parameter forcefully deletes the key without prompting for confirmation. Caution: Modifying the registry incorrectly can cause serious problems. Ensure you type the command exactly as shown.
Execute Command 2: Network Configuration Reset
Immediately after the first command, type or copy and paste the following command and press Enter:
netcfg -v -u dni_dne
This command utilizes the netcfg utility to uninstall the DNE filter driver. The -v parameter provides verbose output (optional but helpful for troubleshooting), and -u dni_dne specifically instructs netcfg to uninstall the “Deterministic Network Enhancer” driver.
Reboot the System: After executing both commands, restart your computer. Rebooting is essential to apply the changes made to the registry and network configuration. Upon restarting, Windows should re-enumerate network adapters and hopefully resolve the Wi-Fi detection issue.
3. VPN Software Management
Managing the VPN software itself is a crucial step in resolving and preventing these Wi-Fi issues. This involves both uninstallation and reinstallation, as well as considering software updates.
Uninstall and Reinstall VPN Software: A clean reinstallation of your VPN software can often resolve conflicts.
- Uninstall: Go to “Control Panel” -> “Programs” -> “Programs and Features” (or “Settings” -> “Apps” -> “Installed apps” in Windows 11). Locate your VPN software in the list, select it, and click “Uninstall.” Follow the uninstallation prompts.
- Reinstall Latest Version: After uninstalling, download the latest version of your VPN software from the vendor’s official website. Install the newly downloaded version. Using the latest version ensures you have the most recent drivers and compatibility updates, minimizing the chance of conflicts with Windows.
Network Reset Feature: Windows offers a “Network reset” feature that can be beneficial in resolving various network problems, including those related to VPN conflicts.
- Access Network Reset: Go to “Settings” -> “Network & Internet” -> “Advanced network settings” -> “Network reset” (or search for “Network reset” in the Windows search bar).
- Perform Reset: Click the “Reset now” button. Warning: Network reset will remove and then reinstall all your network adapters and reset networking components to their default settings. This means you may need to reconfigure VPN and other network software afterward, including Wi-Fi passwords. Confirm the reset when prompted. After the reset, your computer will restart automatically. Check if Wi-Fi detection is restored after the reboot.
Important Considerations for Specific VPN Clients
Users of certain VPN clients, particularly older versions of Cisco VPN client and SonicWALL Global VPN client, should be especially cautious during Windows upgrades.
Cisco VPN Client and SonicWALL Global VPN Client
Microsoft has specifically noted that older versions of Cisco VPN client and SonicWALL Global VPN client are known to cause this Wi-Fi detection issue. If you are using either of these VPN clients, especially older versions, it is strongly recommended to uninstall them before upgrading Windows.
Pre-Upgrade Uninstallation: Before initiating a Windows upgrade, completely uninstall the Cisco VPN client or SonicWALL Global VPN client from your system. This proactive step can prevent the DNE filter driver conflict from occurring in the first place.
Vendor Software Upgrade: After upgrading Windows and if you still need to use Cisco or SonicWALL VPN, contact your VPN vendor to obtain and install a version of their software that is officially supported on the new Windows version. Using a compatible, updated VPN client is crucial to avoid future network issues and ensure seamless operation.
Additional Tips for Maintaining Network Stability
Beyond the immediate fixes, adopting certain practices can help maintain network stability and prevent future VPN-related Wi-Fi issues.
-
Regular VPN Software Updates: Keep your VPN software updated to the latest version. VPN vendors regularly release updates that include bug fixes, performance improvements, and compatibility patches for newer operating systems. Enabling automatic updates, if available in your VPN software, is a good way to ensure you are always running the most current version.
-
Check for Driver Updates: Periodically check for updated drivers for your wireless network adapter and other network hardware. Visit the website of your computer or network adapter manufacturer to download and install the latest drivers. Outdated drivers can sometimes lead to compatibility issues, especially after operating system updates.
-
System Restore Point: Before making significant system changes, such as installing new software or performing major updates, create a system restore point. If something goes wrong, you can easily revert your system back to a previous working state. Windows automatically creates restore points in some cases, but manually creating one before potentially risky operations is a good practice.
By following these troubleshooting steps and preventative measures, users can effectively resolve VPN-related Wi-Fi detection problems on Windows 11/10 and maintain a stable and reliable network connection.
If you have encountered similar issues or have other effective solutions, please share your experiences in the comments below!
Post a Comment