Master Instagram Reels: A Complete Guide to Setup, Recording, Editing & Publishing
Instagram Reels has rapidly become a dominant force in the realm of social media, providing users with an engaging platform for creating and sharing short-form video content. Emerging as a response to the popularity of platforms like TikTok, Reels offers a dynamic space within the Instagram ecosystem for users to express their creativity, connect with audiences, and discover trending content. Distinguished from traditional Instagram videos by their concise nature and focus on trends, Reels have empowered individuals and brands alike to captivate viewers in brief, impactful bursts. This guide will provide a comprehensive walkthrough on mastering Instagram Reels, from initial setup to publishing your creative vision.
How to Record Instagram Reel
For those new to the world of Instagram Reels, understanding the basics is the first step towards creating compelling content. An Instagram account is the primary requirement to begin your Reels journey. The platform offers flexibility in audience reach through two types of Reels: Private and Public. Private Reels are designed for sharing with your existing followers, fostering engagement within your established network. In contrast, Public Reels are discoverable by a wider audience, extending beyond your follower base and tapping into Instagram’s broader community. Instagram’s sophisticated algorithms play a crucial role in content discovery, curating and highlighting standout Reels under the coveted ‘Featured’ label, thereby increasing their visibility and potential for viral reach.
Part 1 – Set up your Instagram Reel video
Before you hit record, setting up your Instagram Reel is crucial for tailoring your video to your creative vision. This setup phase involves customizing various aspects such as incorporating music, adjusting playback speed, and applying visual filters to enhance your content.
-
Launch Instagram Reels: Begin by opening the Instagram application on your smartphone. Navigate to the Reels creation interface by tapping the Camera icon, typically located at the bottom center or right corner of the screen, often near the Home button. This action will usually open to the standard Instagram Stories camera or directly to the Reels interface depending on your app version and recent usage. If it opens to Stories, look for the Reels option at the bottom menu, usually next to “Story” and “Live”.
-
Access Recording Interface: Once in the Reels section, you’ll likely see a feed of recommended Reels. To start creating your own, locate and tap the Camera icon, often positioned at the top right corner of the screen. This action will transition you to the recording interface, where you can begin to configure your Reel.

Within the recording interface, Instagram provides several options to customize your Reel before you even start recording. These options are usually located on the left-hand side of the screen, allowing for easy access and adjustment.
-
Length: Determine the duration of your Reel. You can typically choose between options like 15 seconds, 30 seconds, 60 seconds, and even 90 seconds, depending on the current Instagram Reels updates. Shorter durations are ideal for quick, punchy content, while longer durations allow for more elaborate storytelling or demonstrations. Select the length that best suits your content’s needs and pacing.
-
Audio: Music and sound are integral to the impact of Reels. Tap the Audio icon to access Instagram’s extensive music library. You can browse trending audio, explore various genres, or search for specific songs or artists to find the perfect soundtrack for your Reel. If you prefer to use your original voice or sounds captured live during recording, you can skip this option entirely. Keep in mind that using trending audio can significantly boost your Reel’s discoverability.
-
Speed: Manipulate the pace of your video with the Speed control. Instagram Reels typically offers speed adjustments ranging from 0.3x (slow motion) to 5x (fast motion). Experiment with different speeds to create dramatic slow-motion effects or energetic fast-paced sequences. This feature is excellent for emphasizing specific moments or adding stylistic flair to your video.
-
Effects: Enhance the visual appeal of your Reel with a wide array of Effects. Tap the Effects icon to explore Instagram’s vast library of augmented reality (AR) filters, visual effects, and even voice changers. Filters can transform your appearance, add fun animations, or create unique atmospheres. Voice changers can alter your voice for comedic or creative effect. Browse through the categories to find effects that complement your content and style.
-
Timer: For hands-free recording or when you need to position yourself before recording begins, the Timer feature is invaluable. Set a countdown timer, typically offering options like 3 seconds or 10 seconds. Once activated, the timer will count down before recording automatically starts, giving you time to prepare and get into position. This is particularly useful for solo creators or when setting up shots that require distance from the camera.
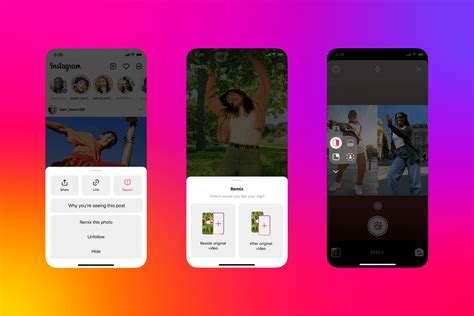
After meticulously configuring these settings to match your creative vision, you are now fully prepared to begin recording your Instagram Reel. Each option provides a layer of customization that contributes to the overall impact and engagement of your final video.
Part 2 – Record and edit your Instagram Reel video
With your setup complete, the next stage is to bring your Reel to life through recording and post-recording edits. This is where your creative ideas transform into visual content.
-
Initiate Recording: To start capturing your video, locate the prominent Record button, usually a large circular button at the bottom center of the screen. Tap and hold this button to record. As you hold, a progress bar will typically appear at the top of the screen, visually indicating the recording duration and counting down towards your selected time limit (e.g., 15, 30, 60, or 90 seconds). Release the button to stop recording. You can record in segments, releasing and re-pressing the record button to create cuts and transitions within your Reel.
-
Enhance with Overlays: Once you’ve recorded your initial footage, Instagram Reels offers a suite of editing tools to enhance your video with overlays. Look for icons typically at the top of the screen to access these features:
-
Text: Add written messages directly onto your Reel. Tap the Text icon (often represented by ‘Aa’) to open the text editor. Here, you can type your desired text, choose from various fonts, adjust text size and color, and position your text anywhere on the screen. Text overlays are excellent for adding context, captions, or engaging calls to action to your video.
-
Stickers: Inject personality and fun into your Reel using Stickers. Tap the Sticker icon (usually a square smiley face) to access a library of animated stickers, GIFs, emojis, and interactive stickers like polls or quizzes. Browse through the options and tap to select a sticker, which you can then drag, resize, and rotate on your video. Stickers can add visual interest, humor, or interactive elements to your content.
-
Draw: For a personal touch, use the Draw tool (often a squiggle line icon). This feature allows you to draw directly on your video using your finger or a stylus. You can select different pen types, colors, and thicknesses to create doodles, annotations, or emphasize specific parts of your visual content.
-
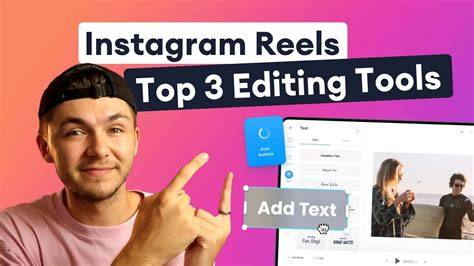
- Preview and Trim: After applying your edits, Instagram provides a preview of your Reel. Before finalizing, utilize the Trim option, typically found at the bottom of the preview screen, often represented by scissors or timeline adjustment icons. This tool allows you to refine the length of your video by adjusting the start and end points. Trim away any unwanted footage at the beginning or end to ensure your Reel is concise and engaging.
By this stage, your Instagram Reel is nearly complete, with recording and essential editing steps finalized. You’ve captured your content, enhanced it with overlays, and refined its duration, setting the stage for the final step: publishing your Reel to the world.
Part 3 – Publish your Instagram Reel video
The final step in sharing your creation is publishing your Instagram Reel. This process is straightforward and allows for a few final touches to maximize your Reel’s impact and reach.
-
Share to Reels: Once you are satisfied with your preview and edits, tap the Share button, typically located at the bottom right corner of the screen, often labeled ‘Next’ or represented by a right-arrow icon. This action will navigate you to the sharing screen. Ensure you are under the Reels tab at the top of this screen, confirming you are publishing to Reels and not just your Instagram Story feed.
-
Add a Caption: Craft an engaging Caption for your Reel. The caption box is prominently displayed on the sharing screen. Use this space to provide context to your video, add relevant hashtags to increase discoverability, ask questions to encourage engagement, or simply add a catchy phrase. A well-written caption can significantly enhance the appeal and reach of your Reel.
-
Select a Cover: Choose a compelling Cover image for your Reel. Tap the Cover button, usually located below or next to the caption area. You can select a frame directly from your video by scrolling through the video timeline at the bottom. Alternatively, you often have the option to ‘Add from Camera Roll’ to upload a custom-designed cover image. A visually appealing cover is crucial for grabbing attention as users browse Reels.
-
Final Share: With your caption and cover set, you are now ready to publish. Tap the Share button, typically large and prominently placed at the bottom of the screen, often labeled with ‘Share’ or a checkmark icon. Upon tapping this, your Reel will be published to Instagram Reels, becoming visible to your followers and potentially to a wider audience if your account is public.
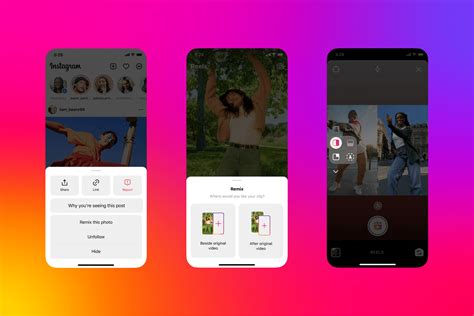
After publishing your Reel, consider further extending its reach by sharing it to your Instagram Story. This can be done immediately after publishing or later by accessing your Reel and selecting the ‘Share’ option. Sharing to your Story can notify your followers who might have missed it in the Reels feed and drive additional views.
Conclusion
As demonstrated, creating and publishing an Instagram Reel is a swift and user-friendly process, accessible to anyone with a smartphone and the Instagram app. The ease of content creation on Reels, however, also means that the platform is a highly competitive space. To truly stand out and maximize the benefits of Reels, focusing on the quality and creativity of your content is paramount.
Instagram Reels thrives on bite-sized, engaging content that quickly captures audience attention. If your goal is to grow your follower base or increase engagement, crafting videos that are concise, impactful, and directly to the point is key. The platform’s design, inspired by the intuitive feel of TikTok, encourages experimentation and creative expression. Instagram has not only adopted successful features but also continuously innovates, making Reels a dynamic and evolving platform.
Ultimately, Instagram Reels presents a powerful avenue for expressing your talents, connecting with a global audience, and building a strong online presence. Whether you are familiar with short-form video platforms or entirely new to this digital landscape, Instagram Reels offers an engaging and rewarding experience for content creation and audience interaction. Understanding the essential elements and mastering the recording and publishing process is your first step towards harnessing the full potential of Instagram Reels to share your unique story with the world.
Embrace the creative opportunities Instagram Reels offers. Experiment with different formats, trends, and styles to discover what resonates best with your audience. The world of Reels is constantly evolving, so stay curious, keep creating, and most importantly, have fun!
What are your favorite Instagram Reels creation tips? Share your thoughts and experiences in the comments below!
Post a Comment