Step-by-Step Guide: Setting Up a Raspberry Pi Virtual Machine (VM)
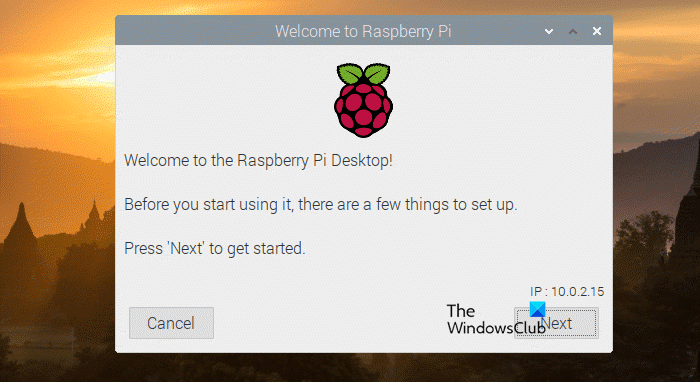
Creating a Raspberry Pi Virtual Machine (VM) allows you to explore the Raspberry Pi OS and its functionalities directly on your computer without needing a physical Raspberry Pi device. This is particularly useful for software development, testing, or simply familiarizing yourself with the Raspberry Pi environment. This guide will walk you through the process of setting up a Raspberry Pi VM using Oracle VirtualBox, a popular and free virtualization software. While VirtualBox is used in this guide, the general steps can be adapted for other VM tools like VMware or Hyper-V.
How to Create a Raspberry Pi Virtual Machine
Setting up a Raspberry Pi Virtual Machine involves a straightforward four-step process. These steps are designed to guide you from initial software installation to having a fully functional Raspberry Pi OS environment running on your virtual machine. Let’s outline these steps before diving into each one in detail.
- Install Oracle VirtualBox: The first step is to ensure you have the virtualization software installed on your host computer. Oracle VirtualBox will serve as the platform to host your Raspberry Pi VM.
- Download Raspberry Pi OS: Next, you need to obtain the Raspberry Pi OS image file. It’s crucial to download the correct version specifically designed for virtual machines.
- Configure VirtualBox for Raspberry Pi: This step involves setting up a new virtual machine in VirtualBox and configuring its settings to be compatible with Raspberry Pi OS. This includes allocating resources such as memory and storage.
- Install Raspberry Pi in VirtualBox: Finally, you will boot the newly configured virtual machine using the downloaded Raspberry Pi OS image and complete the installation process within VirtualBox.
Let’s delve into each of these steps to provide a comprehensive guide for creating your Raspberry Pi Virtual Machine.
1] Install Oracle VirtualBox
Before you can create a Raspberry Pi Virtual Machine, you need to have a hypervisor installed on your computer. Oracle VirtualBox is a robust and free option that works across various operating systems like Windows, macOS, and Linux. To begin, navigate to the official VirtualBox website at virtualbox.org. Locate the download section and choose the VirtualBox package appropriate for your host operating system. Download the installer and proceed with the installation process, following the on-screen instructions. If you already have a hypervisor such as VMware or Hyper-V installed, you can use that instead of installing VirtualBox, as the core concepts remain similar.
2] Download Raspberry Pi OS
With VirtualBox (or your chosen hypervisor) installed, the next step is to download the Raspberry Pi OS image. It’s important to note that you cannot use the standard Raspberry Pi OS image intended for physical devices directly in VirtualBox. Instead, you need to download the Raspberry Pi Desktop image, which is designed to run on x86 architecture machines, making it suitable for virtual machines. Visit the official Raspberry Pi website, specifically the downloads section. Look for the “Raspberry Pi Desktop” option. This is usually available as an ISO image file. Click on the download button to start the download process. The ISO file is relatively large, so the download time will depend on your internet connection speed, potentially taking around 5-10 minutes.
3] Configure VirtualBox for Raspberry Pi
Once you have downloaded the Raspberry Pi OS ISO image, you can proceed with configuring VirtualBox to host your Raspberry Pi VM. This involves creating a new virtual machine and setting its parameters to ensure compatibility and optimal performance for Raspberry Pi OS. Follow these detailed instructions to configure VirtualBox:
-
Open VirtualBox and Create a New VM: Launch the Oracle VirtualBox application. In the VirtualBox Manager window, click on the “New” button, typically located in the toolbar, to initiate the creation of a new virtual machine. This will open the “Create Virtual Machine” wizard.
-
Name and OS Selection: In the “Create Virtual Machine” window, you will first be prompted to name your virtual machine. Choose a descriptive name, such as “Raspberry Pi VM”. Next, you need to specify the operating system. Under “Type”, select “Linux”. For “Version”, choose “Other Linux (64-bit)” or a similar 64-bit Linux option, as Raspberry Pi Desktop is a Debian-based system and generally works well with generic Linux settings in VirtualBox.
-
ISO Image Selection: VirtualBox now allows you to directly select the ISO image during VM creation. Look for an option like “ISO Image” or “Optical Disc”. Click on the dropdown or browse button next to it. Navigate to the location where you downloaded the Raspberry Pi OS ISO image. Select the ISO file and click “Open”. This will attach the ISO image to the virtual machine as a virtual DVD drive.
-
Guest OS Install Configuration (Optional): The wizard may present you with options to configure guest OS installation settings, such as hostname, username, and password. You can configure these settings if you wish to customize the initial setup of your Raspberry Pi OS. If you prefer to configure these later within the VM itself, you can often skip this step or use default settings provided by VirtualBox. Click “Next” to proceed.
-
Memory and CPU Allocation: On the next page, you will need to allocate system resources to your Raspberry Pi VM. This includes RAM (memory) and CPU cores. The recommended memory allocation depends on your host machine’s resources and the intended use of the VM. For basic use and testing, allocating 2GB to 4GB of RAM is usually sufficient. For CPU allocation, assigning 1 or 2 CPU cores from your host machine is a good starting point. Adjust these settings based on your host system’s capabilities and the demands of the tasks you plan to perform within the Raspberry Pi VM. Click “Next” after configuring these.
-
Virtual Hard Disk Allocation: Now you need to allocate storage space for the virtual hard disk where Raspberry Pi OS will be installed. You can choose to create a new virtual hard disk or use an existing one if you have. When creating a new one, you will be asked to specify the size. A minimum of 20GB of virtual disk space is recommended for Raspberry Pi OS to accommodate the OS and applications. You can choose between dynamically allocated and fixed-size virtual disks. Dynamically allocated disks only use space as needed, growing up to the specified maximum size, which is generally more efficient. Fixed-size disks allocate the entire specified space immediately, which can offer slightly better performance but consume disk space upfront. You can also choose the file type for the virtual disk (VDI, VHD, VMDK). VDI is the native VirtualBox format and is usually a good choice. Consider if you want to check the “Pre-allocate Full Size” option. If checked, it will allocate the entire disk space immediately, which can take longer initially but might offer slightly better performance. Click “Next” and then “Finish” to create the virtual machine with the configured settings.
-
Review and Finish: Before finalizing, review all the settings you have configured for the virtual machine in the summary page. Ensure that the allocated memory, CPU, and disk space are appropriate for your needs. Once you are satisfied, click “Finish” to complete the virtual machine creation process.
With these steps completed, you have successfully configured VirtualBox for your Raspberry Pi Virtual Machine. The virtual machine is now ready to have Raspberry Pi OS installed onto it.
4] Install Raspberry Pi in VirtualBox
After configuring the VirtualBox settings for your Raspberry Pi VM, the final step is to install the Raspberry Pi OS within the virtual machine. Although you have configured the VM and attached the ISO image, the operating system is not yet installed on the virtual hard disk. When you first start the VM, it should boot from the attached ISO image, initiating the Raspberry Pi OS installation process. However, in some cases, you might encounter an error message such as “No DEFAULT or UI configuration directive found!”. This is a known issue and can be easily resolved with a minor adjustment in VirtualBox settings. If you encounter this error or to ensure a smooth boot from the ISO, follow these steps:
-
Power Off the Virtual Machine (If Running): If you have already started the virtual machine and encountered the error, power it off completely. Do not just save the machine state, but fully power it down.
-
Access Virtual Machine Settings: In the VirtualBox Manager, select the Raspberry Pi VM you created from the list of virtual machines. Click on the “Settings” button in the toolbar. This will open the settings window for your VM.
-
Navigate to Storage Settings: In the settings window, go to the “Storage” tab. Here, you will see the storage configuration for your virtual machine.
-
Check Controller: IDE: Look for “Controller: IDE” in the storage tree. Underneath “Controller: IDE”, you should see your Raspberry Pi OS ISO image listed as attached to a virtual optical drive. If you see “Empty” under “Controller: IDE” or if the ISO is not listed, you might need to re-attach the ISO image.
-
Re-attach or Verify ISO Image: If the ISO image is not correctly attached or if you see “Empty”, click on the optical drive icon (it might look like a disc) next to “Controller: IDE”. This will open a dropdown menu. Select “Choose a disk file…” from the menu to open a file explorer. Navigate to the location where you saved the Raspberry Pi OS ISO image and select it. This will ensure the ISO image is correctly attached as a virtual DVD drive to the VM. If the ISO is already listed, you can simply verify that it is the correct Raspberry Pi OS ISO image.
-
Confirm and Start VM: After ensuring the ISO image is correctly attached under “Controller: IDE”, click “OK” to close the settings window. Now, select your Raspberry Pi VM in VirtualBox Manager and click the “Start” button (the green arrow) to power on the virtual machine.
With the ISO image correctly attached, the virtual machine should now boot from the Raspberry Pi OS ISO. Follow the on-screen instructions to proceed with the installation of Raspberry Pi OS onto the virtual hard disk you allocated during the VM configuration. The installation process is typically graphical and user-friendly, guiding you through steps like partitioning the virtual disk, setting up users, and configuring system settings. Once the installation is complete, the virtual machine will likely prompt you to reboot. After rebooting, you should have a fully functional Raspberry Pi OS environment running within your VirtualBox VM.
Can I Run Raspberry Pi OS on My Laptop?
Yes, absolutely! Running Raspberry Pi OS on your laptop is precisely what this guide explains how to achieve through virtualization. By using hypervisor software like VirtualBox, VMware, or Hyper-V, and the Raspberry Pi Desktop ISO image, you can create a virtual machine environment that emulates a Raspberry Pi. This allows you to experience and work with Raspberry Pi OS directly on your laptop, leveraging your laptop’s hardware resources to run the virtualized operating system. The steps detailed earlier in this guide provide a comprehensive walkthrough on how to set this up. This is an excellent way to explore Raspberry Pi OS, test software, or develop projects without needing a physical Raspberry Pi board.
Can You Run VMs on Raspberry Pi?
Yes, you can also run Virtual Machines on a Raspberry Pi, although this is a different scenario than running Raspberry Pi OS in a VM on a laptop. While Raspberry Pis are typically known for running as virtual machines (as we’ve discussed), they can also host virtual machines themselves, albeit with some performance considerations due to their hardware limitations compared to desktop computers or servers.
For server virtualization and management on Raspberry Pi, Proxmox VE is a notable open-source platform. Proxmox Virtual Environment (VE) is a powerful, enterprise-grade virtualization platform that supports both virtual machines and containers. It provides a web-based interface for managing VMs and containers, making it relatively user-friendly, especially for those familiar with other virtualization platforms like VirtualBox, VMware, or Hyper-V. Proxmox is designed for server environments, but it can be installed on more powerful Raspberry Pi models (like Raspberry Pi 4 or later with sufficient RAM and storage) to create a home server or a small-scale virtualization setup for learning and experimentation. Running VMs on a Raspberry Pi can be more resource-intensive and may not be suitable for demanding workloads, but it is feasible for lightweight VMs, testing, or specific server applications.
We hope this step-by-step guide has helped you in setting up your Raspberry Pi Virtual Machine. Now you can explore the world of Raspberry Pi OS within the convenience of your computer. Feel free to share your experiences or ask any questions in the comments below!
Post a Comment