Customize Your Event Logs: Change the Default Location in Windows 11/10
Managing event logs is crucial for system administrators and advanced users to monitor system health, diagnose issues, and ensure security. Windows 11 and Windows 10 operating systems, by default, store event logs in a specific location. However, there are scenarios where changing this default location becomes necessary. This might be for organizational purposes, to comply with storage policies, or to separate log files for security or backup reasons. This guide provides comprehensive steps on how to modify the default Event Log file location in Windows 11/10 using two primary methods: Local Group Policy Editor and Registry Editor.
Method 1: Using Local Group Policy Editor
The Local Group Policy Editor is a powerful tool in Windows that allows administrators to configure system settings, including the location of event log files. This method is particularly useful in domain environments or for managing configurations across multiple machines.
To change the default Event Log file location using the Group Policy Editor, follow these detailed steps:
-
Open the Run Dialog: Press the Win + R keys simultaneously. This action will open the Run dialog box, which is used to quickly launch programs and commands in Windows.
-
Launch Group Policy Editor: In the Run dialog box, type
gpedit.mscand press Enter or click OK. This command will open the Local Group Policy Editor console. Note: The Group Policy Editor is not available in Windows 10/11 Home editions. -
Navigate to Security Settings: In the Group Policy Editor window, navigate through the following path in the left-hand pane: Computer Configuration > Administrative Templates > Windows Components > Event Log Service > Security. This path leads you to the security-related settings for the Event Log Service.
-
Locate the ‘Control the location of the log file’ Setting: In the right-hand pane, you will find a list of settings related to security event logs. Look for the setting named “Control the location of the log file”.
-
Edit the Setting: Double-click on the “Control the location of the log file” setting. This action will open a new window where you can configure the setting.
-
Enable the Setting: In the setting window, select the “Enabled” option. Enabling this setting allows you to specify a new location for the event log files.
-
Specify the New Log File Path: In the “Log file path” box provided, enter the desired path for the new Event Log file location. It is crucial to ensure that the path you specify is valid, accessible, and writable by the Event Log service and administrators. For example, you might choose a path like
D:\EventLogs\Security.evtx. -
Apply and Save Changes: Click “Apply” and then “OK” to save the changes. Windows will now attempt to store security event logs in the newly specified location.
Important Considerations for Choosing a New Location:
- Permissions: Ensure that the new location has appropriate permissions. The Event Log service must have write access to this location, and administrators should have read access to review the logs.
- Storage: Verify that the drive or volume where you are relocating the logs has sufficient storage space to accommodate future log growth.
- Accessibility: The location should be easily accessible for administrators who need to review and analyze the event logs.
Reverting to the Default Location:
If you wish to revert to the default Event Log file location, simply navigate back to the “Control the location of the log file” setting in the Group Policy Editor and select the “Not Configured” option. Apply and save the changes. This will instruct Windows to use the default location for storing event logs again.
Method 2: Modifying the Registry Editor
The Registry Editor provides a more direct way to modify system settings, including the Event Log file location. This method is useful when Group Policy Editor is not available or for fine-grained control over the configuration. However, incorrect modifications to the registry can cause system instability, so caution and precision are essential. It is strongly recommended to back up your registry before proceeding.
To modify the location of the Event Log file using the Registry Editor, follow these steps carefully:
-
Open the Run Dialog: Press Win + R keys to open the Run dialog box.
-
Launch Registry Editor: Type
regeditin the Run dialog box and press Enter. -
User Account Control (UAC) Prompt: If prompted by User Account Control, click “Yes” to allow Registry Editor to make changes to your device.
-
Navigate to the Windows Registry Key: In the Registry Editor window, navigate to the following registry path using the left-hand pane:
HKEY_LOCAL_MACHINE\SOFTWARE\Policies\Microsoft\Windows. You can navigate by expanding the folders or by pasting the path into the address bar of the Registry Editor (available in newer versions). -
Create the EventLog Key (if it doesn’t exist):
- Right-click on the “Windows” key in the left pane.
- Select “New” > “Key”.
- Name the new key “EventLog”.
-
Create the Security Key under EventLog (if it doesn’t exist):
- Right-click on the newly created “EventLog” key.
- Select “New” > “Key”.
- Name this key “Security”.
-
Create the File String Value:
- Right-click on the “Security” key.
- Select “New” > “String Value”.
- Name the new string value “File”.
-
Modify the File String Value:
- Double-click on the “File” string value you just created.
- In the “Value data” field, enter the full path to the new location where you want to store the Event Log file. For example,
D:\CustomEventLogs\Security.evtx. - Click “OK” to save the changes.
Precautionary Measures:
- Backup the Registry: Before making any changes to the Registry, it is crucial to back it up. In the Registry Editor, go to “File” > “Export”. Choose a location to save the backup, give it a name, and click “Save”. This backup can be used to restore the registry to its previous state if something goes wrong.
- Create a System Restore Point: Creating a System Restore point is another safety measure. If system instability occurs, you can revert your system to the restore point. Search for “Create a restore point” in the Windows search bar and follow the on-screen instructions.
Reverting to the Default Location (Registry Method):
To revert to the default Event Log location using the Registry Editor, you have two options:
-
Delete the EventLog Key: Right-click on the “EventLog” key located under
HKEY_LOCAL_MACHINE\SOFTWARE\Policies\Microsoft\Windowsand select “Delete”. Confirm the deletion when prompted. Deleting the “EventLog” key will remove all custom settings related to event log location set via the registry, and Windows will revert to the default location. -
Modify the File String Value to Default: You could, in theory, try to set the “File” string value back to the default path. However, the default path is managed internally by the system and is not typically set as a registry value in a way that can be directly modified. Deleting the “EventLog” key is the more reliable method for reverting to defaults in this case.
Default Event Log Location in Windows 11/10
By default, Event Viewer logs in Windows 11 and Windows 10 are stored in the following directory:
C:\Windows\System32\winevt\Logs
You can navigate to this location using File Explorer to view the log files. The log files typically have a .evtx extension.
Verifying the Current Log Path:
If you are unsure of the current location of a specific event log, you can easily verify it through the Event Viewer interface:
-
Open Event Viewer: Search for “Event Viewer” in the Windows search bar and open the application.
-
Navigate to the Log: In the Event Viewer, expand “Windows Logs” or “Applications and Services Logs” in the left pane and select the specific log you are interested in (e.g., “Security”, “Application”, “System”).
-
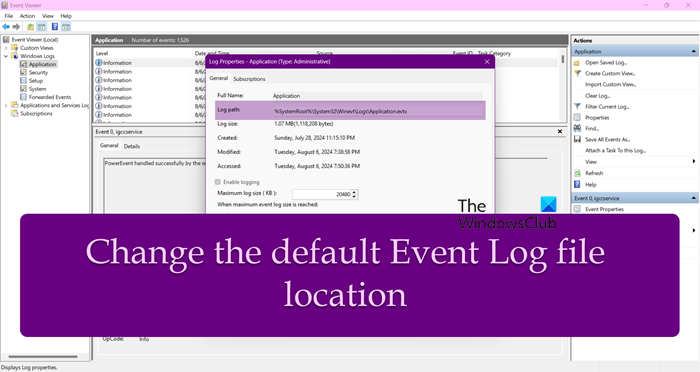
Open Log Properties: Right-click on the selected log (e.g., “Security”) and choose “Properties”.
-
Check the Log Path: In the Properties window, the “Log path” field will display the current location where the log files are stored.
By following these methods, you can effectively customize the location of your Event Logs in Windows 11 and Windows 10, ensuring better organization and management of system logs. Remember to exercise caution, especially when using Registry Editor, and always back up your system before making significant changes.
Feel free to share your experiences or ask any questions in the comments below!
Post a Comment