Troubleshooting: Computer Boots to Black Screen with Blinking Cursor – Causes and Solutions
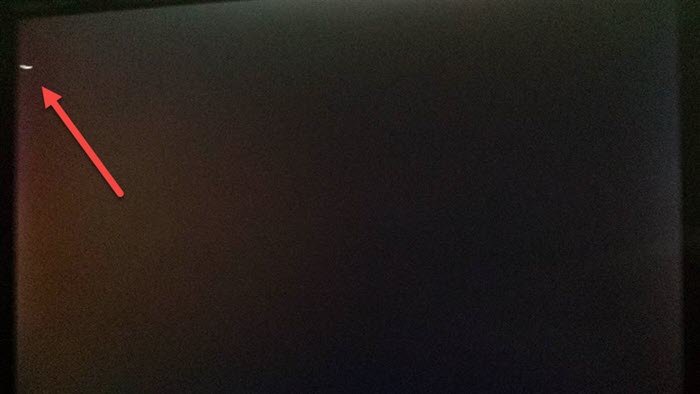
Encountering a black or blank screen accompanied by a blinking cursor upon booting your computer can be a disconcerting experience. This typically signifies that your system’s BIOS (Basic Input/Output System) or UEFI (Unified Extensible Firmware Interface) is struggling to locate a valid bootable source, most commonly your hard drive or SSD where the operating system is installed. The blinking cursor, often appearing as an underscore, essentially indicates the system is paused, awaiting instructions on where to proceed with the startup process.
This issue arises because the initial stage of booting, managed by the BIOS/UEFI, is designed to identify and load the operating system from a designated boot device. When this process falters, the system halts at a black screen with a blinking cursor, unable to progress further into the Windows startup sequence. Understanding the potential causes and solutions is crucial to swiftly resolving this problem and regaining access to your computer.
Understanding the Root Causes
The black screen with a blinking cursor is frequently attributed to a conflict in boot device priorities or an inability to access the primary boot drive. Several factors can contribute to this situation:
- Incorrect Boot Order: The BIOS/UEFI settings dictate the order in which the system checks for bootable devices. If the hard drive containing your operating system is not prioritized in the boot order, the system might attempt to boot from other sources first, leading to a failure and the black screen.
- External Device Conflicts: Connected USB drives, external hard drives, or optical media can sometimes interfere with the boot process. If these devices are inadvertently set as higher priority boot options or contain corrupted boot sectors, they can disrupt the system’s ability to boot from the intended drive.
- Hard Drive or SSD Issues: A malfunctioning or failing hard drive or SSD is a primary suspect. If the drive is physically damaged, corrupted, or has a faulty boot sector, the BIOS/UEFI will be unable to locate and load the operating system, resulting in the black screen error.
- BIOS/UEFI Corruption or Misconfiguration: In rare cases, corruption within the BIOS/UEFI firmware itself or incorrect settings within the BIOS/UEFI configuration can lead to boot failures and the black screen with a blinking cursor.
- Loose or Damaged Data Cables: The SATA or NVMe cables connecting your hard drive or SSD to the motherboard are crucial for data transfer. If these cables are loose, damaged, or faulty, the system may lose connection to the boot drive, causing boot issues.
- Operating System Corruption: While less common in this specific scenario, severe operating system file corruption can sometimes hinder the boot process to the point where the system cannot even initiate the graphical boot sequence, resulting in a black screen.
Solutions to Fix Black Screen with Blinking Cursor
Resolving the black screen with blinking cursor issue typically involves systematically addressing the potential causes outlined above. The following troubleshooting steps are arranged from the simplest to more complex solutions, guiding you through the process of restoring your computer’s boot functionality.
1. Disconnect Unnecessary External Devices
External devices are a common source of boot conflicts. Your computer’s BIOS/UEFI might be attempting to boot from a USB drive, external hard drive, or even an optical disc if these are connected and inadvertently prioritized in the boot order.
Steps to Disconnect External Devices:
- Power off your computer completely. Do not just restart; ensure the system is fully shut down.
- Disconnect all non-essential external devices. This includes:
- USB flash drives
- External hard drives
- Printers
- Scanners
- USB hubs
- Optical discs (CDs/DVDs) in the drive
- SD cards or other media in card readers
- Leave only essential peripherals connected. Typically, you should only need your monitor, keyboard, and mouse connected.
- Power on your computer.
- Observe if the system boots normally.
If your computer boots successfully after disconnecting external devices, it indicates that one of the removed devices was likely causing the boot conflict. You can then reconnect devices one by one, restarting your computer after each reconnection, to pinpoint the problematic device. Once identified, ensure that device is not set as a boot priority in your BIOS/UEFI settings, or consider if the device itself is malfunctioning.
2. Modify Boot Order in BIOS/UEFI Settings
The boot order in your BIOS/UEFI settings dictates the sequence in which your computer checks for bootable devices during startup. If the hard drive or SSD containing your Windows installation is not listed as the primary boot device, the system might fail to boot correctly.
Accessing BIOS/UEFI Settings:
- Power off your computer completely.
-
Power on your computer and immediately start pressing the BIOS/UEFI setup key. This key varies depending on your motherboard manufacturer. Common keys include:
- Delete (Del)
- F2
- F10
- F12
- Esc
- F1
- Ctrl + Alt + Esc
- Ctrl + Alt + Delete
The correct key is often displayed briefly on the screen during the initial startup phase. Consult your motherboard manual if you are unsure. Press the key repeatedly right after powering on to ensure you enter the setup menu.
Navigating BIOS/UEFI and Changing Boot Order:
- Once in the BIOS/UEFI setup menu, navigate to the “Boot” section. The exact name and layout of this section vary depending on your BIOS/UEFI vendor. Look for tabs or menu options labeled “Boot,” “Boot Order,” “Boot Priority,” or similar.
- Locate the boot device priority list. This list displays the order in which the system attempts to boot from available devices.
- Identify your primary hard drive or SSD where Windows is installed. It will typically be listed by its model name or as “Hard Drive,” “SSD,” or similar.
- Change the boot order to prioritize your primary hard drive/SSD. Use the arrow keys, Page Up/Page Down keys, or function keys (as indicated in the BIOS/UEFI interface) to move your primary boot drive to the top of the boot order list.
- Ensure no external devices (like USB drives or CD-ROM) are listed before your primary boot drive unless you intentionally want to boot from them.
- Save the changes and exit BIOS/UEFI. Look for options like “Save & Exit,” “Exit Saving Changes,” or press the key indicated to save and exit (often F10).
- Allow your computer to restart.
- Observe if the system boots normally.
By setting the correct boot order and prioritizing your primary drive, you ensure that the system attempts to boot from the intended operating system location first, resolving boot failures caused by incorrect boot device priority.
3. Investigate Hard Drive/SSD Issues and Consider Reinstallation
If modifying the boot order does not resolve the black screen issue, the problem might stem from your hard drive or SSD itself. A failing or malfunctioning drive can prevent the system from booting.
Checking Hard Drive/SSD Health (Requires Another Working Computer):
- Power off your computer and disconnect the problematic hard drive/SSD.
- Connect the drive to a known working computer as a secondary drive. You may need a SATA-to-USB adapter or an internal drive bay on the working computer.
- Power on the working computer and access the connected drive.
- Use disk diagnostic tools on the working computer to check the health of the drive. Windows has built-in tools like
chkdsk(for file system errors) and third-party drive health monitoring software can provide more comprehensive diagnostics (e.g., CrystalDiskInfo, HD Tune). - Analyze the diagnostic results. Look for errors, bad sectors, or warnings indicating drive failure.
Potential Outcomes and Actions:
- Drive shows severe errors or is failing: This strongly suggests the hard drive/SSD is the root cause. Replacement is likely necessary. Consider upgrading to an SSD for improved performance and reliability. You will need to reinstall Windows on the new drive.
- Drive appears healthy, but still no boot: The issue might be with the operating system installation itself or boot sector corruption, even if the drive hardware is functioning. In this case, reinstalling Windows or attempting boot repair might be necessary.
Reinstalling Windows (If Necessary):
If drive diagnostics indicate drive failure and you have replaced the drive, or if you suspect operating system corruption even with a healthy drive, reinstalling Windows is a potential solution.
- Create Windows installation media (USB or DVD) using the Microsoft Media Creation Tool on a working computer.
- Boot your problematic computer from the installation media. You might need to temporarily change the boot order in BIOS/UEFI to prioritize the USB drive or DVD drive.
- Follow the on-screen prompts to install Windows. During the installation process, you will have the option to format the drive and perform a clean installation.
Boot Repair (Alternative to Reinstallation):
If you suspect boot sector corruption but want to avoid a full reinstallation, you can attempt to repair the boot environment using the Windows Recovery Environment (WinRE).
- Boot from Windows installation media as described above.
- On the “Windows Setup” screen, click “Repair your computer” instead of “Install now.”
- Navigate to “Troubleshoot” > “Advanced options” > “Startup Repair.”
- Select your operating system installation and allow Startup Repair to attempt to fix boot issues automatically.
If Startup Repair fails, you can explore other advanced options in WinRE, such as using Command Prompt to manually rebuild the Boot Configuration Data (BCD) or perform other boot-related repairs using commands like bootrec /fixmbr, bootrec /fixboot, and bootrec /rebuildbcd. These are more advanced steps and require careful execution.
4. Utilize Windows Startup Repair or System Restore (If Accessible)
If you can access the Windows Recovery Environment (WinRE), even if you cannot boot into Windows normally, you can leverage built-in troubleshooting tools to attempt to resolve the black screen issue.
Accessing Windows Recovery Environment (WinRE):
- Method 1 (If system attempts to boot but fails): Repeatedly power your computer on and off during the initial boot sequence (before Windows fully loads) a few times. This might trigger WinRE to launch automatically.
- Method 2 (Using Installation Media): Boot from Windows installation media (USB or DVD) as described in the previous section. On the “Windows Setup” screen, click “Repair your computer.”
Using Startup Repair in WinRE:
- Once in WinRE, navigate to “Troubleshoot” > “Startup Repair.”
- Select your operating system installation (if prompted).
- Allow Startup Repair to diagnose and attempt to automatically fix boot problems. This process may take some time.
Using System Restore in WinRE:
If Startup Repair does not resolve the issue, and if you had System Restore enabled previously, you can try reverting your system to a previous restore point.
- In WinRE, navigate to “Troubleshoot” > “Advanced options” > “System Restore.”
- Follow the on-screen prompts to choose a restore point. Select a restore point created before the black screen issue started.
- Allow System Restore to revert your system to the chosen restore point. This process will undo system changes made since that restore point.
System Restore can be helpful if recent software installations, driver updates, or system configuration changes are suspected to be the cause of the boot problem.
Seeking Professional Assistance
If you have exhausted the troubleshooting steps outlined above and are still encountering the black screen with a blinking cursor, or if you are uncomfortable performing BIOS/UEFI modifications or drive diagnostics, it is advisable to seek professional technical assistance.
- Consult a qualified computer technician or repair service. They have specialized tools and expertise to diagnose hardware and software issues, perform advanced troubleshooting, and repair or replace faulty components.
- Contact your computer manufacturer’s support. If your computer is still under warranty, the manufacturer’s support may be able to provide guidance or arrange for repairs.
Conclusion
The black screen with a blinking cursor on computer boot is a common issue that can often be resolved through systematic troubleshooting. By understanding the potential causes, such as boot order conflicts, external device interference, or hard drive problems, and by following the step-by-step solutions provided, you can effectively diagnose and rectify this problem, restoring your computer’s boot functionality and regaining access to your system. Remember to proceed methodically, starting with the simplest solutions and progressing to more advanced steps as needed.
Post a Comment