Virtual Desktop Deployment Pitfalls: Avoiding Sysprep Generalization Issues
When deploying a Windows image through Hyper-V or setting up a new Virtual Desktop Infrastructure (VDI), you might encounter an error message stating: The virtual desktop is not Sysprep generalized. This error can be perplexing, especially for those unfamiliar with Sysprep and its role in the deployment process. Understanding Sysprep and how to address this issue is crucial for successful virtual desktop deployments.
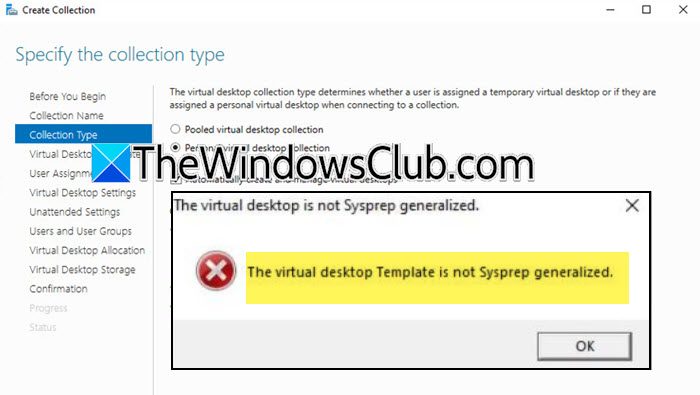
The exact error messages you might encounter are as follows:
The virtual desktop is not Sysprep generalized.
The virtual desktop Template is not Sysprep generalized.
Resolving “The Virtual Desktop is not Sysprep generalized” Error
The System Preparation Tool, commonly known as Sysprep, is a vital utility in Microsoft Windows, primarily used by system administrators and IT professionals. Its core function is to prepare Windows operating system installations for imaging and deployment across multiple machines. The process of generalization using Sysprep removes specific computer-related information, such as installed drivers and the Security Identifier (SID), from a Windows image. This generalization is essential for creating a master image that can be deployed and replicated consistently across numerous devices, saving significant time and effort, particularly in large-scale environments like corporations or educational institutions where uniformity and efficient OS deployment are paramount.
If you are facing the “virtual desktop is not Sysprep generalized” error, the following solutions can help resolve the issue:
- Generalize Sysprep
- Fix fatal error
Let’s explore each of these solutions in detail.
1] Generalizing Sysprep
As the error message explicitly indicates, the virtual machine image is not Sysprep generalized. Therefore, the primary solution is to generalize the image using Sysprep. Follow these steps to generalize your image:
- Open Hyper-V Manager: Launch the Hyper-V Manager application on your system.
- Start the Template VM: In Hyper-V Manager, locate the virtual machine template that is causing the error. Right-click on the template and select Start to power on the virtual machine.
- Access Command Prompt as Administrator: Once the virtual machine has booted and you are logged in, open the Command Prompt with administrative privileges. You can do this by searching for “cmd” in the Start Menu, right-clicking on “Command Prompt,” and selecting “Run as administrator.”
- Navigate to the Sysprep Directory: In the Command Prompt, use the Change Directory (CD) command to navigate to the Sysprep directory. Simply type
cd sysprepand press Enter. This command assumes you are currently in theSystem32directory, which is the default starting location for Command Prompt in most cases. If not, you may need to navigate toC:\Windows\System32\sysprepusingcd C:\Windows\System32\sysprep. -
Execute the Sysprep Command: Once you are in the Sysprep directory, execute the following command:
sysprep.exe /oobe /generalize /shutdown /mode:vmLet’s break down this command:
*sysprep.exe: This is the executable for the System Preparation Tool.
*/oobe: Stands for Out-of-Box Experience. This option configures Windows to boot into the OOBE screen the next time it starts. OOBE is the initial setup process that users go through when they first start Windows, allowing them to configure settings like language, region, and user accounts.
*/generalize: This is the crucial option that instructs Sysprep to remove system-specific data from the Windows image. This includes unique identifiers, event logs, and other hardware-specific information, making the image suitable for deployment to multiple computers.
*/shutdown: This option tells Sysprep to shut down the computer after the generalization process is complete.
*/mode:vm: This parameter specifies that Sysprep is being run on a virtual machine. While often optional, it’s good practice to include it when working with VMs to ensure optimal configuration.After executing the command, Sysprep will initiate the generalization process. You will see a prompt indicating “Sysprep is working; Processing generalize phase Sysprep plugins.” This process may take some time to complete. Once finished, the virtual machine will automatically shut down.
After the VM shuts down, it will be Sysprep generalized. You can now attempt to deploy the image. In most cases, this process resolves the “virtual desktop is not Sysprep generalized” error, and your virtual desktop deployment should proceed successfully.
2] Fixing Fatal Errors during Sysprep
In some instances, the Sysprep generalization process might fail, resulting in a fatal error. You might encounter the following error message:
A fatal error occurred while trying to sysprep the machine.
This error indicates that Sysprep was unable to complete the generalization process due to an underlying issue. One common cause of this fatal error is related to the SkipRearm registry setting.
The SkipRearm key is a registry entry in Windows that controls the Windows Software Licensing Rearm program. This program is responsible for resetting the Windows licensing state. It achieves this by removing or resetting activation-related licensing data and registry information. Sometimes, issues with licensing or activation can interfere with Sysprep generalization.
To address potential fatal errors related to SkipRearm, follow these steps to modify the registry:
- Open Registry Editor: Press Windows Key + R to open the Run dialog box. Type
regeditand press Enter to open the Registry Editor. -
Navigate to the SoftwareProtectionPlatform Key: In the Registry Editor, navigate to the following registry path using the left-hand pane to expand the folders:
HKEY_LOCAL_MACHINE\SOFTWARE\Microsoft\Windows NT\CurrentVersion\SoftwareProtectionPlatform -
Modify SkipRearm Value: In the
SoftwareProtectionPlatformkey, look for the SkipRearm entry in the right-hand pane. If it exists, double-click on SkipRearm to open its Edit Value dialog. - Set Value Data to 1: In the Edit Value dialog, change the Value data field to
1. Click OK to save the changes. If SkipRearm does not exist, you might need to create it. Right-click in the right-hand pane, select New -> DWORD (32-bit) Value, and name itSkipRearm. Then, double-click it and set the Value data to1. - Close Registry Editor: Close the Registry Editor.
- Re-run Sysprep: After modifying the SkipRearm value, try running the Sysprep command again as described in the “Generalizing Sysprep” section above.
In many cases, modifying the SkipRearm value resolves fatal errors during Sysprep generalization. However, if the issue persists, there might be other underlying problems. For further troubleshooting steps and more in-depth solutions to fatal Sysprep errors, you can consult dedicated guides that address this specific issue, such as “A fatal error occurred while trying to sysprep the machine”. (Note: As per instructions, I am not including hyperlinks, but in a real article, this would be a link)
Common Causes of Sysprep Failure
Sysprep failures can stem from various reasons. Understanding these common causes can help in preventing issues proactively. Some typical reasons for Sysprep to fail include:
- Outdated Microsoft Store Apps: If the Microsoft Store apps installed in the Windows image have not been updated recently, it can sometimes interfere with Sysprep. Ensuring that apps are up-to-date can mitigate this issue.
- Pending Windows Updates: Pending Windows updates that require a reboot to finalize installation can also cause Sysprep to fail. It’s recommended to install all available Windows updates and reboot the system before running Sysprep.
- Outdated Windows Image: If the base Windows image itself is significantly outdated and hasn’t been upgraded in a long time, it might contain components or configurations that are incompatible with Sysprep’s generalization process. Keeping the base image relatively current can help avoid such problems.
- Customizations and Third-Party Software: Extensive customizations or the presence of certain third-party software, especially those that deeply integrate with the operating system, can sometimes conflict with Sysprep. In such cases, it might be necessary to review and potentially remove or reconfigure these customizations or software before running Sysprep.
Read: “Sysprep was not able to validate your Windows installation” (Note: Again, no hyperlink as per instructions) for more information on validation errors during Sysprep.
Locating Sysprep Log Files
When troubleshooting Sysprep issues, log files are invaluable resources. Sysprep generates two primary log files that record details about the generalization process: setupact.log and setuperr.log.
- setupact.log: This log file contains detailed information about the actions performed by Sysprep, including successful operations and any warnings encountered.
- setuperr.log: This log file specifically records any errors that occur during the Sysprep process.
These log files can be found in several locations within the Windows file system. You can use File Explorer to navigate to the following paths to locate them:
C:\Windows\PantherC:\Windows\Panther\UnattendGCC:\Windows\System32\sysprep\Panther
By examining these log files, particularly setuperr.log, you can often gain valuable insights into the cause of Sysprep failures and identify specific errors or issues that need to be addressed.
By following the steps outlined in this article, you should be able to effectively troubleshoot and resolve the “virtual desktop is not Sysprep generalized” error, ensuring a smooth and successful virtual desktop deployment process. Remember to carefully review the Sysprep logs if you encounter persistent issues, as they often hold the key to identifying the root cause.
Do you have any experiences with Sysprep errors in virtual desktop deployments? Share your tips and questions in the comments below!
Post a Comment