Windows 11 Update Blocked? Free Up Space and Get Installing!
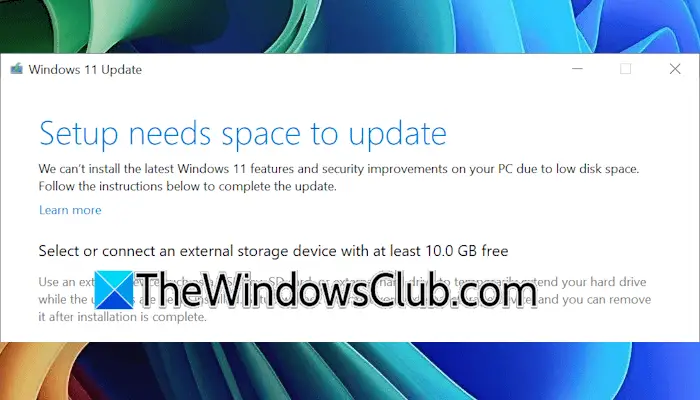
Windows 11 installation and updates require sufficient free disk space on your HDD or SSD to proceed smoothly. When your computer lacks the necessary disk space, the installation or update process can be interrupted, preventing you from enjoying the latest features and security improvements. Many users encounter the frustrating error message: “Setup needs space to update Windows 11” during the update process. If you are facing this issue, this guide provides comprehensive solutions to help you free up disk space and successfully update your Windows 11 system.
Fix “Setup needs space to update Windows 11/10” Error
Encountering the “Setup needs space to update” message while attempting to install or update Windows 11 or Windows 10 indicates that your system drive is running low on free space. To resolve this, you need to liberate some disk space. Here are several effective methods to free up disk space on your Windows system:
- Use Disk Cleanup
- Disable Page file and Hibernation
- Delete System Restore Points and disable System Protection
- Delete unused or inactive profiles
- Miscellaneous steps to free up space on the C drive
Let’s explore each of these methods in detail to reclaim valuable disk space and pave the way for a successful Windows 11 update.
1] Utilize Disk Cleanup
Disk Cleanup is a readily available built-in utility within Windows 11 designed to assist users in freeing up hard drive space. It achieves this by identifying and removing unnecessary or junk files that accumulate over time. To access this utility, simply use the Windows 11 Search bar and type “Disk Cleanup.” Once the application launches, you will be presented with options to clean up various file categories.
To perform a more thorough cleanup, select the “Clean up System Files” option within Disk Cleanup. This action will relaunch the tool with elevated permissions, allowing it to target system-related files for removal. Choose your C drive, which is typically the system drive, and click “OK” to initiate the scan. Disk Cleanup will then analyze your system files, identifying potential space-saving opportunities.
Upon completion of the scan, you will be presented with a list of file categories that can be removed. Some options, such as temporary internet files and downloaded program files, are usually selected by default as they are generally safe to delete. You can further explore the list and select additional options to maximize space recovery. For instance, “Windows Upgrade log files” and “System error memory dump files” can sometimes consume a significant amount of disk space. Deleting these files is generally safe and does not negatively impact system stability. However, it’s worth noting that removing system error memory dump files will prevent you from troubleshooting Blue Screen of Death (BSOD) errors using those specific logs. After making your selections, click “OK” to proceed with the cleanup process. Once completed, restart your computer and check if you can now update Windows 11 without encountering the space error.
2] Disable Page File and Hibernation
If the “Setup needs space” error persists after using Disk Cleanup, it signifies that more disk space needs to be freed. In such scenarios, disabling the Page file and Hibernation features on your C drive can provide a substantial amount of additional space. The Page file is a hidden system file on your hard drive that Windows uses as virtual memory. It extends your RAM by using a portion of your hard drive to temporarily store data when your physical RAM is full. Hibernation is a power-saving mode that saves the current state of your system to the hard drive, allowing for a quick resume while consuming minimal power.
Disabling both Hibernation and the Page file can free up considerable space on your C drive, particularly if you have a large Page file or hibernation file. It’s important to note that while disabling the Page file can save space, it might impact system performance if your system frequently relies on virtual memory. Therefore, it is generally recommended to re-enable the Page file after successfully updating Windows 11. Hibernation is less critical for system operation and can often be disabled without noticeable performance drawbacks for most users.
To disable the Page file, follow these detailed steps:
- Open Windows 11 Settings. You can do this by pressing the Windows key + I or by searching for “Settings” in the Start menu.
- Navigate to System > About. This section displays basic information about your computer.
- On the “About” page, find and click on Advanced system settings. You might need to scroll down to locate this option. This will open the System Properties window.
- In the System Properties window, switch to the Advanced tab. This tab contains performance and virtual memory settings.
- Under the Performance section, click the Settings button. This will open the Performance Options window.
- In the Performance Options window, go to the Advanced tab again.
- Under the Virtual memory section, click the Change button. This will open the Virtual Memory window where you can modify page file settings.
- In the Virtual Memory window, uncheck the box labeled “Automatically manage paging file size for all drives”. This is crucial as it allows you to manually configure page file settings for each drive.
- Select the C drive from the list of drives.
- Choose the “No paging file” option and click the Set button. This action disables the page file specifically for the C drive.
- Click OK on all open windows (Virtual Memory, Performance Options, System Properties) to save the changes. You may be prompted to restart your computer for the changes to take effect.
After completing these steps, check if you can now update Windows 11. If space is still an issue, consider disabling Hibernation as well. To disable hibernation, you can open Command Prompt as administrator and type the command powercfg /hibernate off and press Enter. To re-enable it later, use the command powercfg /hibernate on.
3] Delete System Restore Points and Disable System Protection
System Restore points are snapshots of your system files and settings taken at a specific point in time. They are designed to allow you to revert your system to a previous working state if problems arise after software installations, driver updates, or system changes. While beneficial for system recovery, these restore points can accumulate over time and consume a significant amount of disk space, especially on your C drive.
To check the space occupied by System Restore points and manage them, you can access the System Restore tool. In the Windows Search bar, type “Create a restore point” and select the matching result from the search results. This will open the System Properties window directly to the System Protection tab.
In the System Protection tab, select your C drive from the list and click the Configure button. In the configuration window, you will see information about the current disk space usage for restore points. If you find that restore points are consuming a substantial portion of your C drive space, you can take action to free up space.
To delete existing restore points, simply click the Delete button in the configuration window. This will remove all existing restore points for the selected drive, freeing up the space they were using. Alternatively, you can choose to completely disable System Protection for the C drive. Disabling System Protection will not only delete all existing restore points but also prevent the system from creating future restore points. To disable System Protection, select the “Disable system protection” option in the configuration window and click OK.
It’s important to understand the implications of disabling System Protection. While it can free up disk space, it also means that you will not be able to use System Restore to revert your system to a previous state in case of future issues. Disabling System Protection itself does not harm your system directly, but it removes a valuable recovery option. After successfully updating Windows 11, you can re-enable System Protection if you wish to resume creating restore points for future system recovery. To re-enable, go back to the System Protection configuration and select “Turn on system protection” and adjust the disk space allocation as needed.
After deleting restore points or disabling system protection, attempt to update Windows 11 again. If the space error persists, proceed to the next methods for freeing up disk space.
4] Delete Unused or Inactive User Profiles
Windows 11 allows for the creation of multiple user profiles on a single computer. Each user profile has its own dedicated folder located on the C drive to store personal files, documents, settings, and application data. Consequently, each user profile consumes disk space on the C drive. If your system contains user profiles that are no longer in use or are inactive, deleting them can free up a noticeable amount of disk space, especially if these profiles contain substantial data.
Before deleting any user profile, it is crucial to ensure that you have backed up any important data associated with that profile if needed. Deleting a user profile permanently removes all files and settings associated with it. To delete unused or inactive user profiles, you typically need administrator privileges.
To delete a user profile in Windows 11:
- Open Settings.
- Go to Accounts > Other users.
- Under the “Other users” section, you will see a list of user accounts on your system.
- Select the user profile you wish to delete. Ensure it is an unused or inactive profile.
- Click the “Remove” button next to the selected user profile.
- Windows will prompt you to confirm the deletion. Read the warning message carefully, as deleting a profile is irreversible. If you are certain you want to delete the profile, click “Delete account and data”. This option will remove the user profile and all associated data. If you choose “Delete account”, it might keep some user data, but it’s generally recommended to remove data as well to free up space.
After deleting the unused user profiles, check the available space on your C drive and attempt the Windows 11 update again. If you still need more space, proceed to the miscellaneous steps for further cleanup.
5] Miscellaneous Steps to Free Up Space on the C Drive
In addition to the methods mentioned above, several other miscellaneous steps can contribute to freeing up more space on your C drive. These steps, while seemingly small individually, can collectively add up to a significant amount of reclaimed disk space.
-
Empty Recycle Bin: The Recycle Bin stores deleted files temporarily before they are permanently removed. Files in the Recycle Bin still consume disk space. Emptying the Recycle Bin permanently deletes these files, freeing up the space they occupied. Simply right-click on the Recycle Bin icon on your desktop and select “Empty Recycle Bin”. Confirm the action when prompted.
-
Delete Temporary Files: Temporary files are created by Windows and applications for various purposes, often related to temporary data or installation processes. These files can accumulate over time and consume disk space unnecessarily. To delete temporary files:
- Press Windows key + R to open the Run command box.
- Type %temp% and click OK. This will open the Temp folder in File Explorer.
- Select all files and folders within the Temp folder (Ctrl+A) and press the Delete key. Some files might be in use and cannot be deleted; you can skip these.
-
Uninstall Unused Programs: Applications installed on your system consume disk space. Review the list of installed programs and uninstall any applications that you no longer use or rarely use. To uninstall programs:
- Open Settings.
- Go to Apps > Installed apps.
- Scroll through the list of installed applications.
- For each application you want to uninstall, click the three dots next to its name and select “Uninstall”.
- Follow the on-screen prompts to complete the uninstallation process.
-
Consider Cloud Storage or External Drives: If you have large files such as documents, photos, videos, or music on your C drive, consider moving them to cloud storage services (like OneDrive, Google Drive, Dropbox) or external hard drives. This can significantly reduce the space occupied on your C drive.
By implementing these miscellaneous steps in conjunction with the previous methods, you should be able to free up a substantial amount of space on your C drive, resolving the “Setup needs space to update Windows 11” error and allowing you to proceed with the update process.
How do I free up 10 GB of space on Windows?
Freeing up 10 GB of space on Windows is often achievable by employing a combination of the methods discussed above. The success and ease of freeing up 10 GB depend on several factors, including the current state of your hard drive, the types of files stored, and your system configuration.
Using Disk Cleanup, especially with the “Clean up system files” option, can often reclaim a significant amount of space, potentially several gigabytes, by removing temporary files, system logs, and other unnecessary data. Disabling Hibernation and the Page file can also free up a substantial amount of space, particularly if these features are configured to use a large portion of your disk. Deleting System Restore points can also contribute significantly, depending on how much space is allocated for System Protection and how many restore points are stored. Uninstalling large, unused applications and emptying the Recycle Bin are also effective ways to free up space.
Whether you can precisely free up 10 GB depends on the specific contents of your hard drive. If you have a large number of temporary files, system logs, or unused applications, you might easily exceed 10 GB. However, if your drive is already relatively clean, freeing up 10 GB might require more effort, such as moving personal files to external storage or cloud services. For partitions other than the C drive, moving large data files to an external storage device is a straightforward way to free up a specific amount of space.
How to fix “We can’t tell if your PC has enough space to continue installing Windows 11”?
The error message “We can’t tell if your PC has enough space to continue installing Windows 11. Try restarting Setup” commonly arises due to insufficient disk space required for the Windows 11 installation process. While the message suggests restarting Setup, simply restarting often does not resolve the underlying issue of limited disk space.
This error typically indicates that the Windows 11 installer is unable to determine if there is enough free space to proceed with the installation. The most effective solution is to proactively free up disk space on your C drive using the methods outlined in this guide. Focus on deleting junk files, temporary files, uninstalling unwanted programs, and potentially disabling Hibernation or reducing the Page file size.
After implementing several space-saving measures, restart your computer and attempt to run the Windows 11 Setup again. With sufficient freed-up disk space, the installer should be able to proceed without encountering the “We can’t tell…” error. If the error persists even after freeing up space, it might be worth checking for other potential issues, although disk space is the most frequent cause for this particular error message.
By diligently following these steps and freeing up adequate disk space, you can overcome the “Setup needs space” error and successfully install or update to Windows 11, enjoying the benefits of the latest operating system.
If you have any questions or further tips on freeing up space for Windows updates, feel free to leave a comment below!
Post a Comment