Clean Up Your System Tray: How to Remove Unwanted Devices from Windows' Safe Removal List
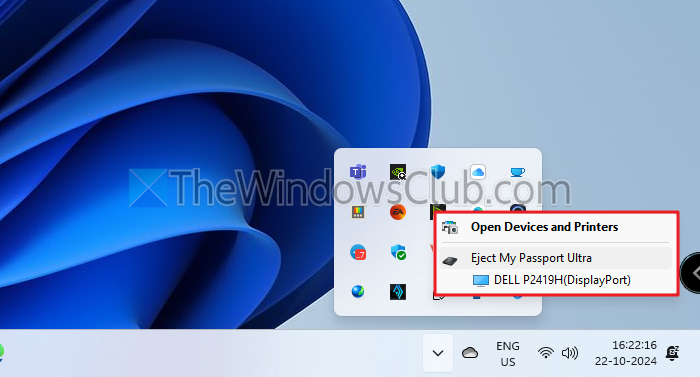
The “Safely Remove Hardware and Eject Media” menu in the Windows system tray is designed to allow users to disconnect devices like USB drives without causing data corruption. However, this menu sometimes displays devices that are permanently connected or don’t require safe removal in the traditional sense. These can include internal drives marked as removable, USB network adapters, certain monitors connected via Type-C, USB sound cards, or even input devices like mice. While their presence isn’t harmful, it can clutter the system tray icon’s menu and cause confusion. If you wish to remove a specific device from this list in Windows 11 or Windows 10, you can achieve this by modifying the Windows Registry and automating the change.
Understanding the “Safely Remove Hardware” Feature
Windows uses a feature called “hot-plugging” for certain hardware types, particularly those connected via USB, Thunderbolt, or eSATA. This allows you to connect and disconnect the device while the computer is running. For storage devices, safely removing ensures that any pending write operations are completed and the device is dismounted, preventing data loss or corruption. The Safely Remove Hardware icon provides a user-friendly way to initiate this process before physically disconnecting the hardware.
However, Windows sometimes misidentifies certain devices as removable even if they are essential system components or devices that are not typically removed during a session. This can happen with internal SATA drives configured in a certain way, non-storage USB devices like adapters, or even displays with integrated USB hubs. While these devices appearing in the list is generally harmless, removing them incorrectly could potentially cause system instability or require a restart to regain functionality. The goal is to hide these specific items from the list, not necessarily to prevent their safe removal capability entirely, which is why a registry modification targeting their visibility is the preferred method.
Identifying the Target Device’s Hardware ID
The first step in hiding a specific device from the Safely Remove Hardware list is to identify it uniquely within the system. Windows manages hardware through device drivers and assigns specific identifiers to each piece of hardware. These identifiers, known as Hardware IDs, are crucial for the operating system to recognize and interact with the device correctly. They are also the key we will use to locate the device’s configuration within the Windows Registry.
To find the Hardware ID for the device you want to remove from the list, you’ll use the Device Manager. This built-in Windows utility provides a centralized view of all hardware recognized by your computer, allowing you to manage drivers, view device properties, and troubleshoot hardware issues. The Hardware IDs are listed within the device’s properties window, offering a unique signature derived from vendor and device codes.
Here’s how to find the Hardware ID:
- Press the Windows key + R simultaneously to open the Run dialog box.
- Type
devmgmt.mscand press Enter or click OK. This will open the Device Manager window. - Navigate through the categories to find the specific device you wish to hide. Devices that appear in the Safely Remove list are often found under categories like “Disk drives,” “Network adapters,” “Sound, video and game controllers,” “Universal Serial Bus controllers,” or other similar entries depending on the device type.
- Once you locate the device, right-click on it and select Properties from the context menu. This will open the Properties window for that specific device.
- In the Properties window, click on the Details tab. This tab provides detailed information about the selected device, accessible through a property dropdown menu.
- Click the dropdown menu under “Property” and select Hardware IDs. This will display a list of one or more hardware identification strings in the “Value” box below.
- The list contains strings that uniquely identify the device model. Select the topmost ID (which is usually the most specific one) by right-clicking on it in the Value box.
- From the context menu that appears, select Copy. This action copies the selected Hardware ID string to your clipboard, ready to be used in the next step.
Keep this Hardware ID string handy, as you will need it to navigate the Windows Registry and locate the corresponding device entry. An example ID might look something like USB\VID_XXXX&PID_YYYY&Rev_ZZZZ or PCI\VEN_XXXX&DEV_YYYY&SUBSYS_ZZZZZZZZ. These codes represent the Vendor ID, Product ID, Revision, and Subsystem, among other potential identifiers, providing a highly specific fingerprint for the hardware.
Modifying the Windows Registry
With the Hardware ID copied, the next step involves editing the Windows Registry. The Registry is a hierarchical database that stores low-level settings for the Microsoft Windows operating system and for applications that opt to use the Registry. It contains configuration settings for hardware devices, installed software, user preferences, and operating system settings. Editing the Registry incorrectly can cause serious system problems, so it is crucial to follow the steps carefully and consider backing up the registry before making changes.
We will navigate to the specific location in the Registry where information about enumerated hardware devices is stored. By modifying a particular value associated with the device’s capabilities, we can instruct Windows to exclude it from the Safely Remove Hardware list.
Here’s how to modify the Registry:
- Press the Windows key + R simultaneously to open the Run dialog box.
- Type
regeditand press Enter or click OK. If prompted by User Account Control, click Yes to allow the Registry Editor to open. - In the Registry Editor window, navigate to the following key by expanding the folders in the left-hand pane:
HKEY_LOCAL_MACHINE\SYSTEM\CurrentControlSet\Enum - Under the
Enumkey, you will find several subkeys representing different bus types (like PCI, USB, SCSI, etc.). Since most devices appearing unexpectedly in the Safely Remove list are connected via USB or Type-C (which often uses USB protocols), expand the USB key. For other device types, you might need to explore keys likePCIorSCSI. - Within the
USBkey, you will see many subkeys, often starting withVID_andPID_followed by hexadecimal numbers. These correspond to the Vendor ID and Product ID found in the Hardware ID you copied earlier. You need to find the subkey that matches theVIDandPIDportion of your device’s Hardware ID. Expand this matching subkey. - Inside the
VID_XXXX&PID_YYYYkey, you will find one or more subkeys. These usually represent different instances of the device that have been connected to the computer (e.g., connected to different USB ports). Their names are often unique serial numbers or instance IDs (e.g.,00000000001A0B300,1&12345&6). - Expand the subkey corresponding to the specific instance of the device you want to hide. If there are multiple instances and you want to hide the device regardless of the port it’s connected to, you might need to apply the change to each instance subkey.
- Within the device instance key (e.g.,
HKEY_LOCAL_MACHINE\SYSTEM\CurrentControlSet\Enum\USB\VID_XXXX&PID_YYYY\InstanceID), look for a subkey named Device Parameters. Click on Device Parameters. - In the right-hand pane, locate the DWORD value named Capabilities. If this value does not exist, you may need to create it. Right-click in the right pane, select New, then select DWORD (32-bit) Value, and name it
Capabilities. - Double-click on the Capabilities value to modify its data. Change the Value data field to
60. Ensure that the Base is set to Hexadecimal. Click OK. - Close the Registry Editor.
- Restart your computer for the changes to take effect.
By setting the Capabilities value to 60 (Hexadecimal), you are modifying certain flags related to the device’s behavior reported to the operating system. While the exact meaning of all bits in the Capabilities value can be complex and vary, setting it to 60 specifically includes flags that tell Windows not to display the device in the Safely Remove Hardware list. This modification doesn’t remove the device from the system or disable it; it merely controls its visibility in that particular system tray menu.
Understanding the Capabilities Value
The Capabilities DWORD value is a bitmask where individual bits correspond to different capabilities or properties of a device as reported to the operating system. Setting this value to 60 in hexadecimal corresponds to 96 in decimal. In binary, this value is 0110 0000. The bits set here are related to PnP (Plug and Play) properties. Bit 5 (value 32 or 0010 0000 binary) is related to the device being removable, and Bit 6 (value 64 or 0100 0000 binary) is related to the device being dockable. While 60 (or 96 decimal) might seem like a combination of flags, empirically, setting this specific value for a USB device entry in the Enum\USB key effectively hides it from the Safely Remove Hardware list. Other values exist (like 4 for CM_DEVCAP_SURPRISEREMOVAL_OK, which allows surprise removal without warning), but 60 is the value commonly used for hiding from the list. It’s important to note that modifying other values in the Registry, especially under CurrentControlSet, can have unintended consequences.
Automating the Registry Modification Using Scheduled Task
You might find that after restarting your computer, the Capabilities value you changed in the Registry reverts to its original state. This can happen if the device driver or another system process overwrites the value during the boot sequence. To ensure the device remains hidden from the Safely Remove Hardware list consistently, you can create a Scheduled Task that automatically applies the registry change every time your computer starts.
Creating a Scheduled Task involves configuring Windows to run a specific command or script at a predefined trigger, in this case, system startup. We will use the reg.exe command-line utility to modify the registry value automatically with elevated privileges.
Here’s how to create the scheduled task:
- Open the Task Scheduler. You can do this by pressing Windows key + R, typing
taskschd.msc, and pressing Enter, or by searching for “Task Scheduler” in the Start menu. - In the Task Scheduler library (the left pane), right-click on “Task Scheduler Library” and select Create Task.
- In the “General” tab of the Create Task window:
- Give the task a descriptive name, such as
Hide_MyDevice_SafeRemoval(replace “MyDevice” with something specific to your device). - Add a brief description explaining what the task does.
- Select the option Run whether user is logged on or not. This ensures the task runs even before you log in.
- Check the box Run with highest privileges. This is necessary for the task to have permission to modify the
HKEY_LOCAL_MACHINEportion of the Registry. - Configure for: Select your Windows version (Windows 10 or Windows 11).
- Give the task a descriptive name, such as
- Go to the “Triggers” tab and click New….
- Set the Begin the task dropdown to At startup.
- Ensure Enabled is checked.
- Click OK.
- Go to the “Actions” tab and click New….
- Ensure Action is set to Start a program.
- In the Program/script field, type
reg.exe. - In the Add arguments (optional) field, enter the command to modify the registry. You need to replace the path with the exact registry key path for your device’s instance that you found in the previous step. The command should look like this:
add "HKLM\SYSTEM\CurrentControlSet\Enum\USB\VID_XXXX&PID_YYYY\InstanceID\Device Parameters" /v Capabilities /t reg_dword /d 0x00000060 /f- Replace
VID_XXXX&PID_YYYY\InstanceID\Device Parameterswith the actual path you copied or noted down from Registry Editor. add: Specifies that you are adding or modifying a registry value."...": The full path to the registry key, enclosed in quotes because it contains spaces or special characters./v Capabilities: Specifies the value name to modify (Capabilities)./t reg_dword: Specifies the data type as DWORD./d 0x00000060: Specifies the data value (60 in hexadecimal)./f: Forces the operation, overwriting the value if it already exists without prompting.
- Replace
- Click OK.
- Go to the “Conditions” tab. You might want to uncheck “Start the task only if the computer is on AC power” if you are on a laptop and want the task to run even on battery power.
- Go to the “Settings” tab. You can review the settings here, ensuring “Allow task to be run on demand” is checked, and potentially adjust the “If the task is already running, then the following rule applies” setting (usually “Do not start a new instance” is fine).
- Click OK to save the task.
- You will likely be prompted to enter the username and password for the user account under which the task will run (even though we selected SYSTEM, it might ask for confirmation or the current user’s credentials depending on system configuration). Enter the password if required.
- Close Task Scheduler.
The scheduled task is now configured to run at every system startup, reapplying the Capabilities value to 60 for your specified device. This ensures that the device remains hidden from the Safely Remove Hardware list even if Windows or a driver attempts to reset the value. You can test the task by restarting your computer and checking the system tray icon.
Alternative Method: Using the Command Line Safely Remove Dialog
While the method above hides the device from the system tray icon’s menu, it does not disable the ability to safely remove it programmatically. If you still need to safely eject the device on occasion but don’t want it cluttering the system tray, you can access the standard Safely Remove Hardware dialog directly via a command.
This can be useful for devices that you do sometimes disconnect, but perhaps infrequently, or if you prefer using the command line for quick access.
To open the Safely Remove Hardware dialog using the Run command or Command Prompt:
- Press Windows key + R to open the Run dialog box.
- Type the following command:
RunDll32.exe shell32.dll,Control_RunDLL hotplug.dll - Press Enter or click OK.
This command executes a function within shell32.dll (Control_RunDLL) to open a control panel item (hotplug.dll), which is the Safely Remove Hardware utility. A window will pop up listing all currently available devices that can be safely removed, allowing you to select the desired device and click “Stop” before disconnecting it. This provides a fallback method for safely removing hardware even if the system tray icon is hidden or the specific device is removed from its list.
Why the Eject Option Might Be Missing for USB Drives
Occasionally, users report that the “Safely Remove Hardware” icon or the eject option is missing entirely for certain USB storage devices. This is less about clutter and more about the device’s perceived removability status by Windows. While the registry modification discussed above forces a device out of the list, a missing eject option usually stems from Windows not considering the drive hot-pluggable or configured for quick removal.
One common cause for a USB drive not showing the eject option is related to Power Management settings, specifically the USB selective suspend feature. This power-saving feature allows Windows to suspend power to individual USB ports or devices when they are not actively being used. While beneficial for battery life on laptops, it can sometimes interfere with the enumeration or consistent availability of USB devices, potentially affecting the Safely Remove function’s visibility.
To address a missing eject option related to power settings:
- Open the Control Panel. You can search for “Control Panel” in the Start menu.
- Change the “View by” setting to either “Large icons” or “Small icons” to see all Control Panel items.
- Click on Power Options.
- Next to your currently selected power plan (e.g., “Balanced,” “Power saver,” “High performance”), click Change plan settings.
- In the Edit Plan Settings window, click Change advanced power settings. This opens the Power Options dialog box.
- Scroll down and expand USB settings.
- Expand USB selective suspend setting.
- Click on the setting (it will likely say “Enabled” for both “Plugged in” and potentially “On battery”).
- Change the setting to Disabled for both “Plugged in” and “On battery” (if applicable).
- Click Apply and then OK to save the changes.
- Close the Power Options window and Control Panel.
- Restart your computer.
Disabling USB selective suspend ensures that Windows maintains continuous power to USB devices, which can sometimes resolve issues with devices not appearing correctly in the Safely Remove Hardware list or having their eject option missing. If this does not resolve the issue, the problem might be related to the device’s driver or how Windows is configuring its removable media policy, which can sometimes be adjusted in Device Manager under the drive’s Policies tab (though this option is less common for standard USB flash drives in recent Windows versions configured for “Quick removal”).
Troubleshooting and Considerations
- Backup the Registry: Before making any changes to the Windows Registry, it is highly recommended to back it up. You can do this in Registry Editor by going to File > Export and saving the entire registry or just the specific key you plan to modify. This allows you to restore the registry to its previous state if something goes wrong.
- Verify the Hardware ID: Double-check that the Hardware ID and the corresponding registry key path you found are correct and match the device you intend to hide. Modifying the wrong key can lead to unexpected system behavior.
- Permissions: Ensure you run Registry Editor and Task Scheduler with administrator privileges. Modifying keys under
HKEY_LOCAL_MACHINE\SYSTEMrequires elevated permissions. - Device Reappears: If the device reappears in the Safely Remove list despite the scheduled task, double-check the task configuration, especially the registry path in the arguments. Also, verify that the task is running successfully in the Task Scheduler History. Ensure the task is set to run with highest privileges and configured for your Windows version.
- Multiple Instances: If your device appears under multiple instance IDs in the Registry (e.g., because you’ve plugged it into different ports), you may need to apply the
Capabilitiesvalue change to each instance key and include each specific instance path in your scheduled task command (potentially by creating multiple actions or using a script). - System Stability: While hiding a device from the list is generally safe, be cautious when modifying system settings. If you experience any issues after making these changes, revert the
Capabilitiesvalue to its original data or delete the scheduled task you created. - Alternative Methods: Some advanced users might explore scripting solutions (PowerShell or batch scripts) to make these registry changes, which can offer more flexibility than a simple
reg.execommand, especially when dealing with multiple device instances. However, the Scheduled Task withreg.exeis often sufficient for a single device.
By following these steps, you can effectively clean up your system tray’s Safely Remove Hardware list, removing devices that don’t need to be there while still retaining the ability to safely eject hardware when necessary. This leads to a less cluttered and more intuitive system tray experience. Remember to proceed with caution when editing the Windows Registry and ensure you have backups.
What devices clutter your Safely Remove Hardware list? Have you tried this method, or do you have an alternative approach? Share your experiences and questions in the comments below!
Post a Comment